EventBook User Guide
Welcome to EventBook!
Thank you for downloading EventBook as your project management software of choice!
Choose a topic from the table of contents below / or in the sidebar to find answers, or step-by-step guides on how to use EventBook.
Product Overview
EventBook is a desktop application for Student Leaders to manage the contacts from different events, optimized for use via a Command Line Interface (CLI) while still having the benefits of a Graphical User Interface (GUI). If you can type fast, EventBook can get your contact management tasks done faster than traditional GUI apps.
Using This User Guide
This user guide provides in-depth summaries of all the commands available to you. To make it easier to find the information you need, you can either:
- Refer to the Table of Contents above
- Search within the guide with the following steps:
- Press Ctrl + F (Windows OS) or Cmd + F (MacOS)
- A search box or dialogue should appear on your screen
- Type the keyword or phrase that you want to find into the search box and press enter
Quick Start
Before we can begin to use EventBook, we advise you to follow the simple steps below to ensure that EventBook is set up correctly.
Ensure you have Java
11or above installed in your Computer.Download the latest
EventBook.jarfrom here.Copy the file to the folder you want to use as the home folder for your EventBook.
Open a command terminal (
Terminalfor MacOS,Windows Terminalfor Windows OS)- MacOS
- Right-click your home folder
- Left click on
Services - Select
New Terminal at Folder
- Windows OS
- Using
Windows Explorer, navigate to your home folder - Right click anywhere in the folder
- Left click on
Open in Windows Terminal
- Using
- MacOS
Use the
java -jar EventBook.jarcommand to run the application.
A GUI similar to the below should appear in a few seconds. Note how the app contains some sample data.
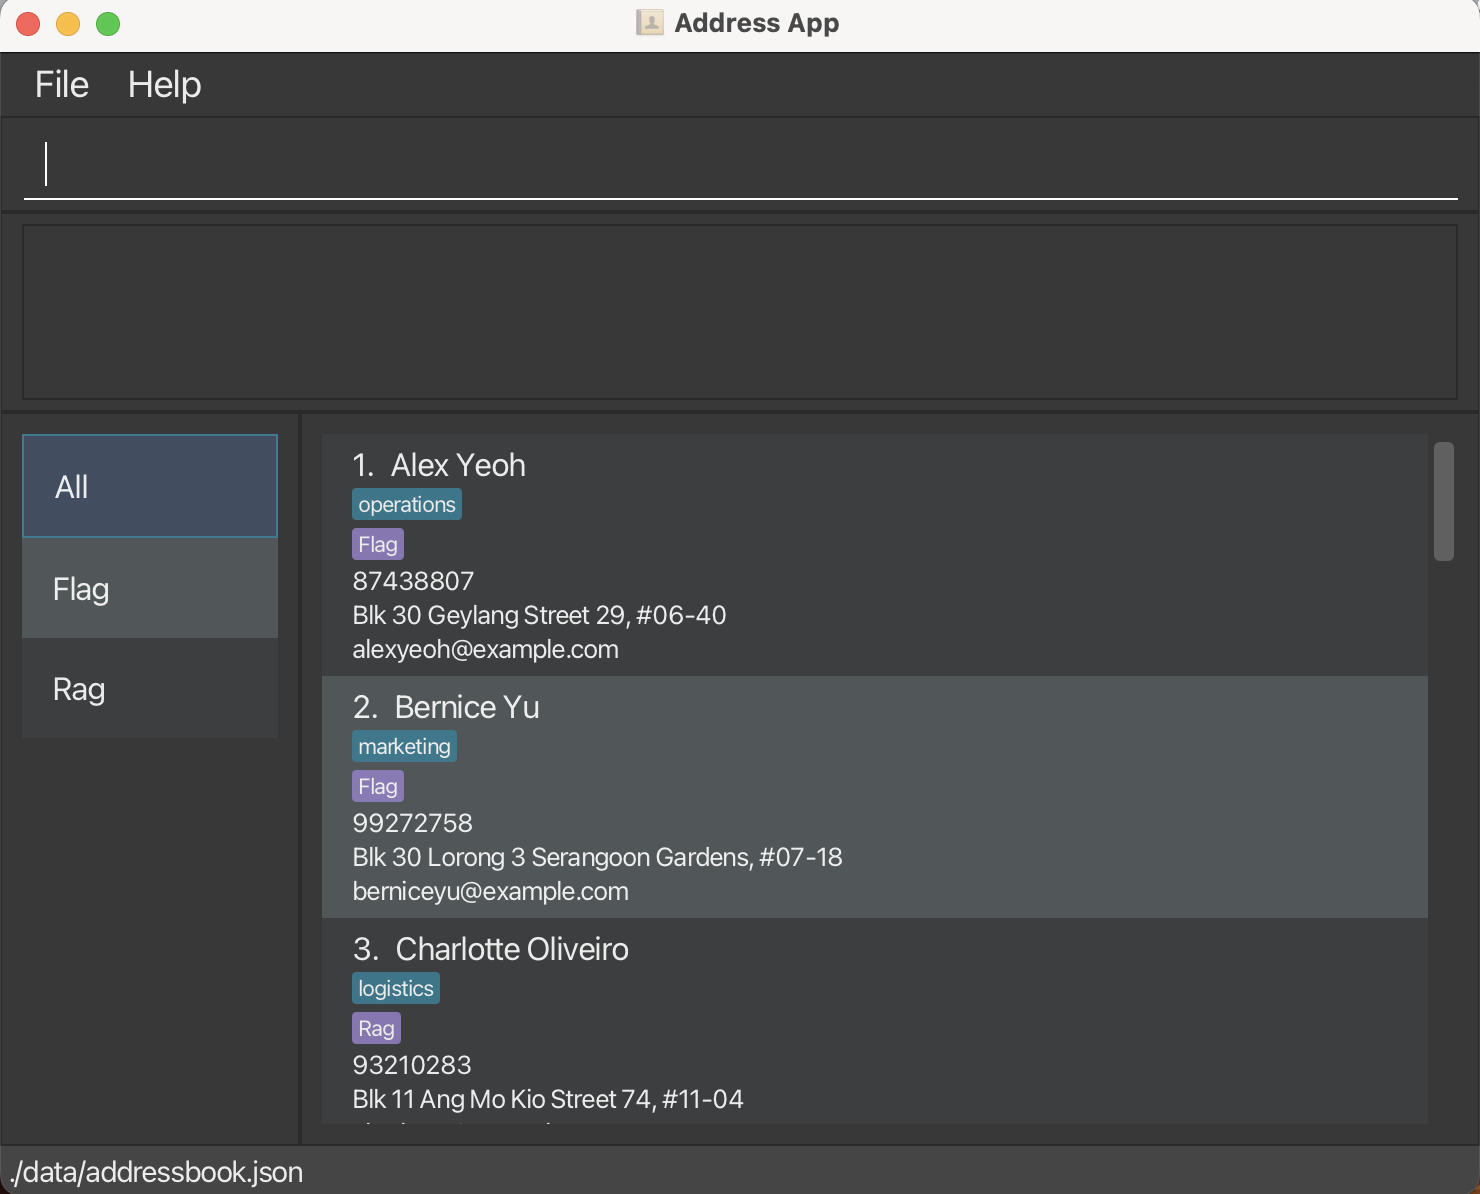
Type a command in the command box and press Enter to execute it. e.g. typing
helpand pressing Enter will open the help window.
Some example commands you can try:list: Lists all contacts.add n/John Doe p/98765432 e/johnd@example.com a/John street, block 123, #01-01: Adds a contact namedJohn Doeto the EventBook.assign 1 t/E-event1: Assigns the 1st contact shown in the current list with the event tag namedevent1.assign John t/tag1: Assigns the contact named John in the current list with the tag namedtag1.clear: Deletes all contacts.ctag Friend: Creates a tag nameFriend.ctag t/E-orientation dc/Orientation! sd/2024-04-04 02:02:02 ed/2024-04-05 02:02:02: Creates an event tag.dtag Friend: Deletes a tag namedFriend.delete 3: Deletes the 3rd contact shown in the current list.devent orientation: Deletes an event tag called orientation.delete John Doe: Deletes the contact named John Doe shown in the current list.exit: Exits the app.import: Imports contacts from.\import\import.csv.search Friend: Displays all contacts with the tagFriend.switch Flag: Switches toFlagevent tab to show contacts.
Refer to the Features below for details of each command or to Command Summary for a quick summary.
Graphical User Interface (GUI)
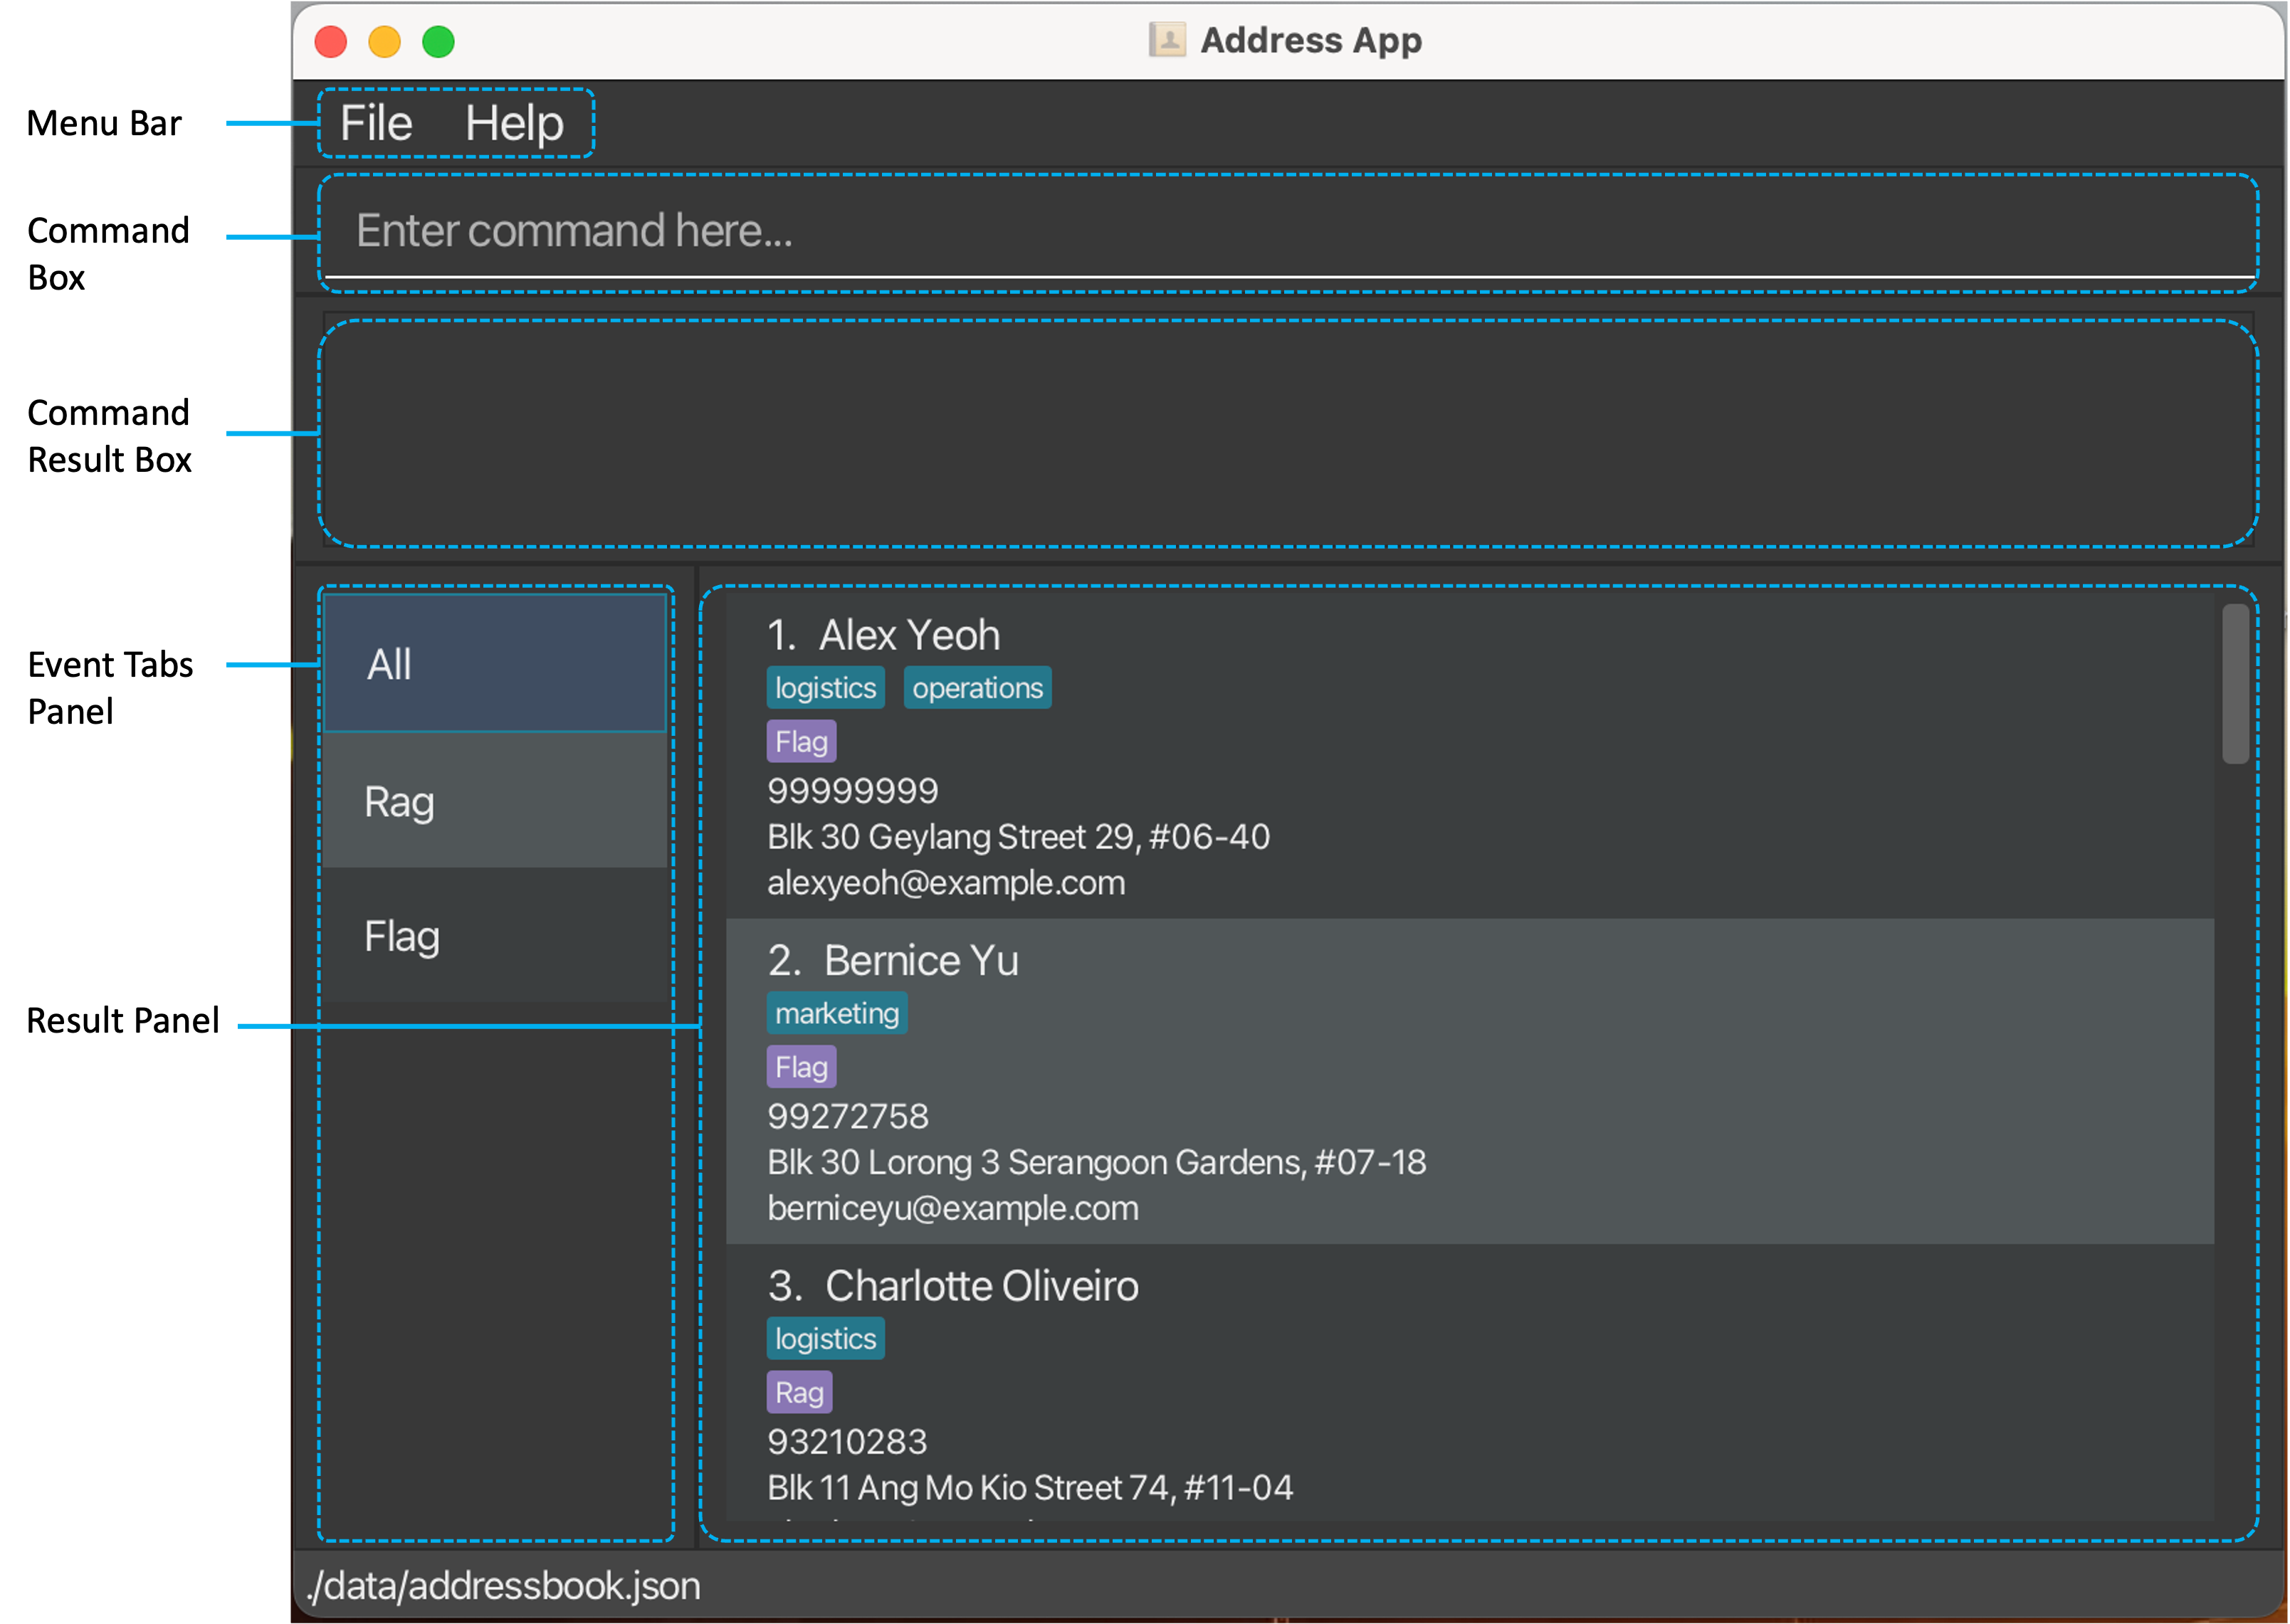
EventBook's GUI consists of 5 main components:
- Menu Bar
- Command Box - enter the command you would like to execute here.
- Command Result Box - displays command success/error messages after commands are executed.
- Event Tabs Panel - displays all existing Events.
- Result Panel - displays contact details of members in the particular Event.
Person
The following details are displayed for each contact in EventBook:
 This detailed overview enables users to quickly access essential contact information of their event members.
[Note]
The default tab on entering the app is theAlltab, with all contacts in EventBook displayed in the Result Panel.
Try Out Your First Commands!
Ready to dive in? Let's try out a few commands to get you started with EventBook:
- Open EventBook if you haven't already done so by following the steps outlined in the Quick Start section.
- First, let's start with adding a new contact. In the command box, type the following command:
add n/Xavier Tan p/98765432 e/xavt@example.com a/Ang Mo Kio street 2, Block 123, #01-01
- This command will add a new contact named "Xavier Tan" with the provided phone number, email address, and address details.
- Scroll to the bottom of the list of contacts, you will find that Xavier Tan has been successfully added to your contacts!
- Now, let's tag Xavier as the vice-project director
VPDof theFlagevent. Enter the following command in the command box:
assign Xavier Tan t/VPD t/E-Flag
- You will see Xavier has been assigned two new tags: a blue
VPDtag and a purpleFlagevent tag.
- Next, let's try switching to the Flag event tab to view its members. In the command box, type the following
command:
switch Flag
- Notice that the highlighted tab on the left switches from the
Alltab to theFlagtab, and all listed contacts have theFlagevent tag.
Note:
The default tab on entering the app is theAlltab, with all contacts in EventBook displayed in the Result Panel.
- To switch back to the
Alltab to view all your contacts, enter the following command:
list
- Experiment with other basic commands that we have listed in the Quick Start section to get a feel
for how EventBook works!
Now that you are all warmed up, let's delve deeper into the details of each command and how you can use them to supercharge your event management in the next section!
Command Format
Things to take note of before about the format of commands:
Words in
UPPER_CASEare the parameters to be supplied by the user.
e.g. inadd n/NAME,NAMEis a parameter which can be used asadd n/John Doe.Items in square brackets are optional.
e.g.n/NAME [t/TAG]can be used asn/John Doe t/friendor asn/John Doe.Items in round brackets specify two possible parameter types e.g.
(NAME or INDEX)means that eitherNAMEorINDEXshould fill that parameterItems with
… after them can be used multiple times including zero times.
e.g.[t/TAG]…can be used as(i.e. 0 times),t/friend(i.e. 1 time),t/friend t/family(i.e. multiple times) etc.Parameters can be in any order.
e.g. if the command specifiesn/NAME p/PHONE_NUMBER,p/PHONE_NUMBER n/NAMEis also acceptable.Extraneous parameters for commands that do not take in parameters (such as
help,list,exitandclear) will be ignored.
e.g. if the command specifieshelp 123, it will be interpreted ashelp.
[Note]
If you are using a PDF version of this document, be careful when copying and pasting commands that span multiple lines as space characters surrounding line-breaks may be omitted when copied over to the application.
Features
EventBook is divided into 3 categories - managing contacts, managing events with tags and general functions, which are all listed below.
Managing Contacts
Adding a person: add
This command allows you to add a person to the EventBook.
Format: add n/NAME p/PHONE_NUMBER e/EMAIL a/ADDRESS [t/TAG]…
[❗WARNING❗] Names must consist solely of alphabetic characters; any inclusion of numbers or symbols is not permitted. This is to ensure that
delete 2does not create an ambiguity on whether to delete the person with the name2or the person at index2.
[💡TIP💡]
A person can have any number of tags (including 0)
Examples:
add n/John Doe p/98765432 e/johnd@example.com a/John street, block 123, #01-01add n/Betsy Crowe t/friend e/betsycrowe@example.com a/Newgate Prison p/1234567 t/criminal
Editing a person : edit
This command allows you to edit an existing person in the EventBook.
Format: edit (NAME or INDEX) [n/NAME] [p/PHONE] [e/EMAIL] [a/ADDRESS] [t/TAG]…
- Edits the person at the specified
INDEXorNAME. - The index refers to the index number shown in the displayed person list. The index must be a positive integer 1, 2, 3, …
- The name refers to the name shown in the displayed person list. The name must be exactly what is shown in the displayed person list.
- For example,
edit John Doe t/friendsinstead ofedit John t/friends. - At least one of the optional fields must be provided.
- Existing values will be updated to the input values.
- When editing tags, the existing tags of the person will be removed i.e. adding of tags is not cumulative.
- You can remove all the person’s tags by typing
t/without specifying any tags after it.
Examples:
edit 1 p/91234567 e/johndoe@example.comEdits the phone number and email address of the 1st person to be91234567andjohndoe@example.comrespectively.edit Ben n/Betsy Crower t/Edits the person named Ben to beBetsy Crowerand clears all existing tags.edit 2 n/Betsy Crower t/Edits the name of the 2nd person to beBetsy Crowerand clears all existing tags.
Finding a person with keywords : find
This command allows you to find all contacts whose names contain any of the given keywords.
Format: find KEYWORD [MORE_KEYWORDS]
- The search is case-insensitive. e.g.
hanswill matchHans - The order of the keywords does not matter. e.g.
Hans Bowill matchBo Hans - Only the name is searched.
- Only full words will be matched e.g.
Hanwill not matchHans - Persons matching at least one keyword will be returned (i.e.
ORsearch). e.g.Hans Bowill returnHans Gruber,Bo Yang
Examples:
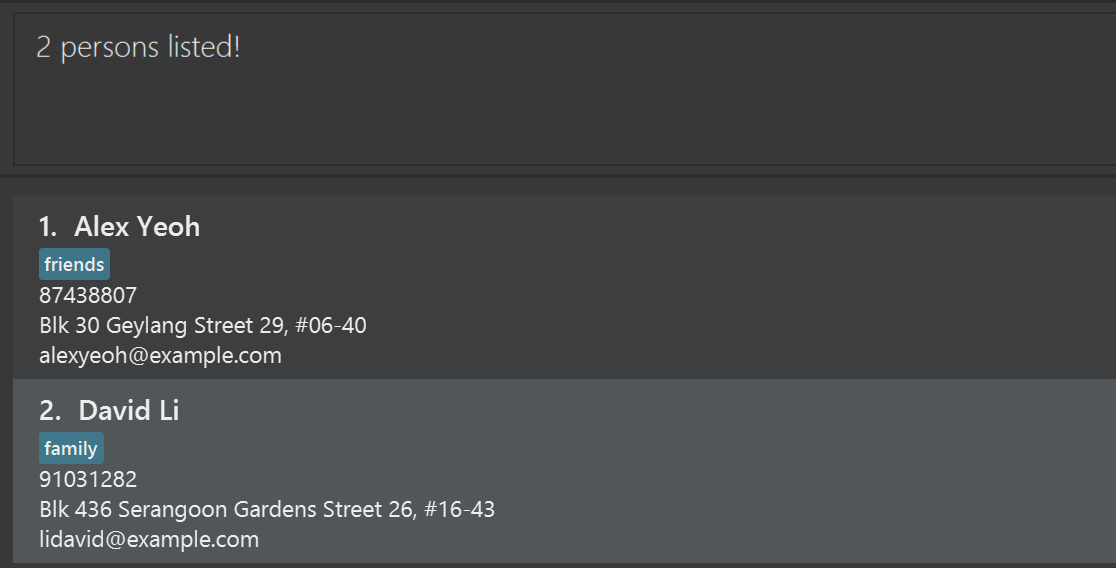
find JohnreturnsjohnandJohn Doefind alex davidreturnsAlex Yeoh,David Li
Deleting a person : delete
This command allows you to delete the specified person from the EventBook.
Format: delete (NAME or INDEX)
- Deletes the person at the specified
INDEXorNAME. - The index refers to the index number shown in the displayed person list. The index must be a positive integer 1, 2, 3, …
- The name refers to the name shown in the displayed person list. The name must be exactly what is shown in the displayed person list.
- For example,
delete John Doeinstead ofdelete John.
Examples:
listfollowed bydelete 2deletes the 2nd person in the EventBook.listfollowed bydelete John Doedeletes the person named 'John Doe' in the EventBook.
Importing contacts from .csv : import
This command allows you to imports all contacts from given file path (default ./import/import.csv)
Format: import f/PATH
Requires a valid file to be given in the
PATHparameterIf PATH is left empty (i.e.
import f/) the default file referenced is./import/import.csvA sample is provided below. Note the fields in the first row and the data in subsequent rows.

Fields:
- The format of the first line of the csv should contain the fields:
NAME,NUMBER,EMAIL,ADDRESS,EVENTS,TAGSas above (.csv is comma delimited, so that means each field should be in their own cell) - The fields are non-caps sensitive (
NameprNaMEwould also be valid)
- The format of the first line of the csv should contain the fields:
Parameters:
- The format of each parameter should follow the same format as in the add command format.
- There should be no blank lines, and no conflicts with contacts in the existing EventBook (e.g. You cannot import a contact if EventBook already contains a contact with the exact same name)
- There should be no trailing empty characters (' ') in any cell.
The
EVENTSparameter must satisfy one of the following format requirements:N/Aif the contact is not in any events, else a field error will occurt/E-eventName dc/Description sd/yyyy-MM-dd HH:mm:ss ed/yyyy-MM-dd HH:mm:ssfor the first instance of each unique event, unless said tag already exists in the EventBook, in which case iii. can be usedt/E-eventNamefor existing events or previously declared events- e.g. If the first contact has
t/E-orientation dc/Orientation! sd/2024-04-04 02:02:02 ed/2024-04-05 02:02:02, then further contacts may simply havet/E-orientationunder theEVENTSfields
- e.g. If the first contact has
The
TAGSandEVENTSportion accept multiple arguments delimited by the|character (e.g. Friend|Colleague). A consequence of this is that tags containing|in their name cannot be importedEnsure that the file provided is saved before used as an import file
The default download contains a sample .csv file that one can refer to
Examples:
import f/./import/import.csvimports the contacts from the specified fileimport f/is identical to running the above command
Exporting contacts from EventBook : export
This command allows you to export all contacts to ./export/export.csv
Format: export
- Note that moving files around may cause export to fail. If one relocates the source files, one must ensure that the ./export directory exists for the export.csv to generate at
- If a file export.csv is already present at ./export, it will be overwritten with the current EventBook data
- The export file format is the same as the output format given in
import
[❗WARNING❗] There should be an empty folder named
exportinside the folder withEventBook.jarto ensure that export function works.
Managing Events and Tags
Creating a tag : ctag
This command allows you to create a tag or an event tag in the EventBook. You are able to manage or search for people with the specified tags after creation.
The ctag function allows you to create tags and events tags separately based on different input formats listed below.
Format 1: ctag TAG_NAME
This format allows you to create tags that you can tag your contacts with!
- The provided name has to be a unique
tagname that does not already exist in the EventBook. - The field "TAG_NAME" allows only alphanumerical inputs, eg.
0-9,a-z,A-Z. - The tag must be a single word. (e.g.
Friendsis allowed butGood Friendsis forbidden) - No trailing or extra whitespaces are allowed.
Example: ctag Friend creates a tag named Friend.
[❗WARNING❗]
- All input fields are necessary.
- If you miss out any of the mandatory fields, or has input the wrong format, your input will get rejected or you will get an incorrect result.
- Make sure your TAG_NAME is alphanumerical(
0-9,a-z,A-Z) with no whitespaces in between them.
[💡TIP💡]
- If you want to create a tag with 2 words, consider grouping them together into a single word. For example: " SchoolFriends"
Format 2: ctag t/E-EVENT_NAME dc/Description sd/yyyy-MM-dd HH:mm:ss ed/yyyy-MM-dd HH:mm:ss
This format allows you to create event tags that you can tag your contacts with! How cool!
- The provided name has to be a unique
EVENT_NAMEname that does not already exist in the EventBook. - The field "EVENT_NAME" allows only alphanumerical inputs, eg.
0-9,a-z,A-Z. For instance,ctag t/E-E-event1 sd/2024-04-04 02:02:02 ed/2024-04-05 02:02:02is not allowed. - The tag must be a single word.(e.g.
Meetingis allowed butFriends Meetingis forbidden) - No trailing or extra whitespaces are allowed.
Examples:
ctag t/E-orientation dc/Orientation! sd/2024-04-04 02:02:02 ed/2024-04-05 02:02:02- Creates an EventTag named orientation that starts from 2024-04-04 02:02:02 to 2024-04-05 02:02:02.
[💡TIP💡]
- If you want to create an event with 2 words, consider grouping them together into a single word. For example: " SchoolEvent"
[❗WARNING❗]
- All input fields are necessary.
- If you miss out any of the mandatory fields, or has input the wrong format, your input will get rejected, or you will get an incorrect result.
- Make sure your EVENT_NAME is alphanumerical(
0-9,a-z,A-Z) with no whitespaces in between them.
Deleting a tag : dtag
This command allows you to delete an existing tag in the EventBook. This is done to allow you to free up memory space by deleting tags that you will no longer use, how thoughtful of us 😃. Take note that this command also deletes the tag from all the contacts in your list.
Format: dtag TAG_NAME
- The provided name has to be a
TAG_NAMEname that already exists in the EventBook. - The field "TAG_NAME" allows only alphanumerical inputs, eg.
0-9,a-z,A-Z. - The tag must be a single word.(In fact, you can only create tags with single word inputs.)
- No trailing or extra whitespaces are allowed.
- The provided tag has to exist in the EventBook.
Examples:
dtag FriendDeletes a tag namedFriend.
[💡TIP💡]
- You can check who is associated with the tag you are deleting by using the Search command.
[NOTE]
If you delete a tag that does not exist, you will get notified by a warning that it does not exist. You will get a success message when you delete an existing tag too.
[❗WARNING❗] All input fields are necessary. This tag will be removed from every contact tagged with it. This action is also not reversible. Make sure your
TAG_NAMEis alphanumerical(0-9,a-z,A-Z) with no whitespaces in between them.
Deleting an EventTag : devent
This command allows you to delete an event tag in the EventBook. Convenient to do so when an event is over, right? Take note that this command also deletes the event tag from all the contacts that are associated with it.
Format: devent EVENT_TAG
- The provided name has to be an
EVENT_TAGname that already exists in the EventBook. - The field "EVENT_TAG" allows only alphanumerical inputs, eg.
0-9,a-z,A-Z. - The event tag must be a single word.(In fact, you can only create event tags with single word inputs.)
- No trailing or extra whitespaces are allowed.
- The provided event tag has to exist in the EventBook.
Examples:
devent orientationDeletes an EventTag namedorientation.
[💡TIP💡] You can do a quick check of who is in the event by using the Switch, do take note that the event panel at the left of the GUI is not clickable.
[❗WARNING❗] Make sure your
EVENT_NAMEis alphanumerical(0-9,a-z,A-Z) with no whitespaces in between them.
[NOTE]
If you delete an event tag that does not exist, you will get notified by a warning that says it does not exist. You will get a success message after deleting an existing tag. The event GUI on the left of the screen will update when you delete an existing event. This event tag will be removed from every contact tagged with it. This action is also not reversible.
Assigning a tag : assign
This command allows you to assign someone to a tag and group them conveniently! For example, you can assign a person with a tag named Logistics or assign a person with an event tag named Rag.
Format: assign (NAME or INDEX) t/TAG… or assign (NAME or INDEX) t/E-EVENT_TAG…
- Assign the person at the specified
INDEXorNAMEwith the tagTAGor with the event tagEVENT_TAG. - The index refers to the index number shown in the displayed person list. The index must be a positive integer 1, 2, 3, …
- The provided tag(s) and event tag(s) have to exist in the EventBook.
- No trailing or extra whitespaces are allowed.
Examples:
assign 1 t/LogisticsAssigns the first person in the list to a tag namedLogistics.assign John Doe t/E-event1Assigns the person named John Doe in the list to an Event Tag namedevent1.
[💡TIP💡]
If you do not have the tag or event tag you are assigning a person with, you can create them with the ctag command.
[❗WARNING❗]
The name refers to the name shown in the displayed person list. The name must be exactly what is shown in the displayed person list. For example,assign John Doe t/friendsinstead ofassign John t/friends.
Searching by tag : search
This command allows you to displays all the people that are tagged with TAG_NAME. We know that to search for a list people who are tagged as Friend,
you are tempted to do search Friends, plural. However, this is not supported 😦.
Format: search TAG_NAME
- The search is case-sensitive.
- The provided tag has to exist in the EventBook.
Examples:
search FriendDisplays all people tagged asFriend.
[💡TIP💡]
After searching, you can reset the app to display all the contacts with the list command.
Switching between events : switch
This command allows you to switch to the event with the EVENT_TAG_NAME.
Format: switch EVENT_TAG_NAME
- The search is case-sensitive.
- The default tab is the
Alltab with full list of contacts displayed.
Examples:
switch FlagSwitches toFlagevent tab and shows all members tagged withFlagevent tag.
[💡TIP💡] After searching, you can reset the app to display all the contacts with the list command.
General Functions
Getting help : help
To access the EventBook User Guide within the application, simply enter help into the command box and a link to the User Guide will be provided.

Format: help
Listing all contacts : list
This command shows a list of all contacts in the EventBook.
Format: list
Clearing all entries : clear
This command clears all the contacts from the EventBook.
Format: clear
Exiting the program : exit
This command exits the program.
Format: exit
Saving the data
EventBook data are saved in the hard disk automatically after any command that changes the data. There is no need to save manually.
Editing the data file
EventBook data are saved automatically as a JSON file [JAR file location]/data/addressbook.json. Advanced users are
welcome to update data directly by editing that data file.
[❗WARNING❗]
If your changes to the data file makes its format invalid, EventBook will discard all data and start with an empty data file at the next run. Hence, it is recommended to take a backup of the file before editing it.
Furthermore, certain edits can cause the EventBook to behave in unexpected ways (e.g., if a value entered is outside the acceptable range). Therefore, edit the data file only if you are confident that you can update it correctly.
Setting Up Your First Event!
This section would guide you through some basic commands of EventBook, and how to use them to set up your first event with contacts and tags.
Clear sample data
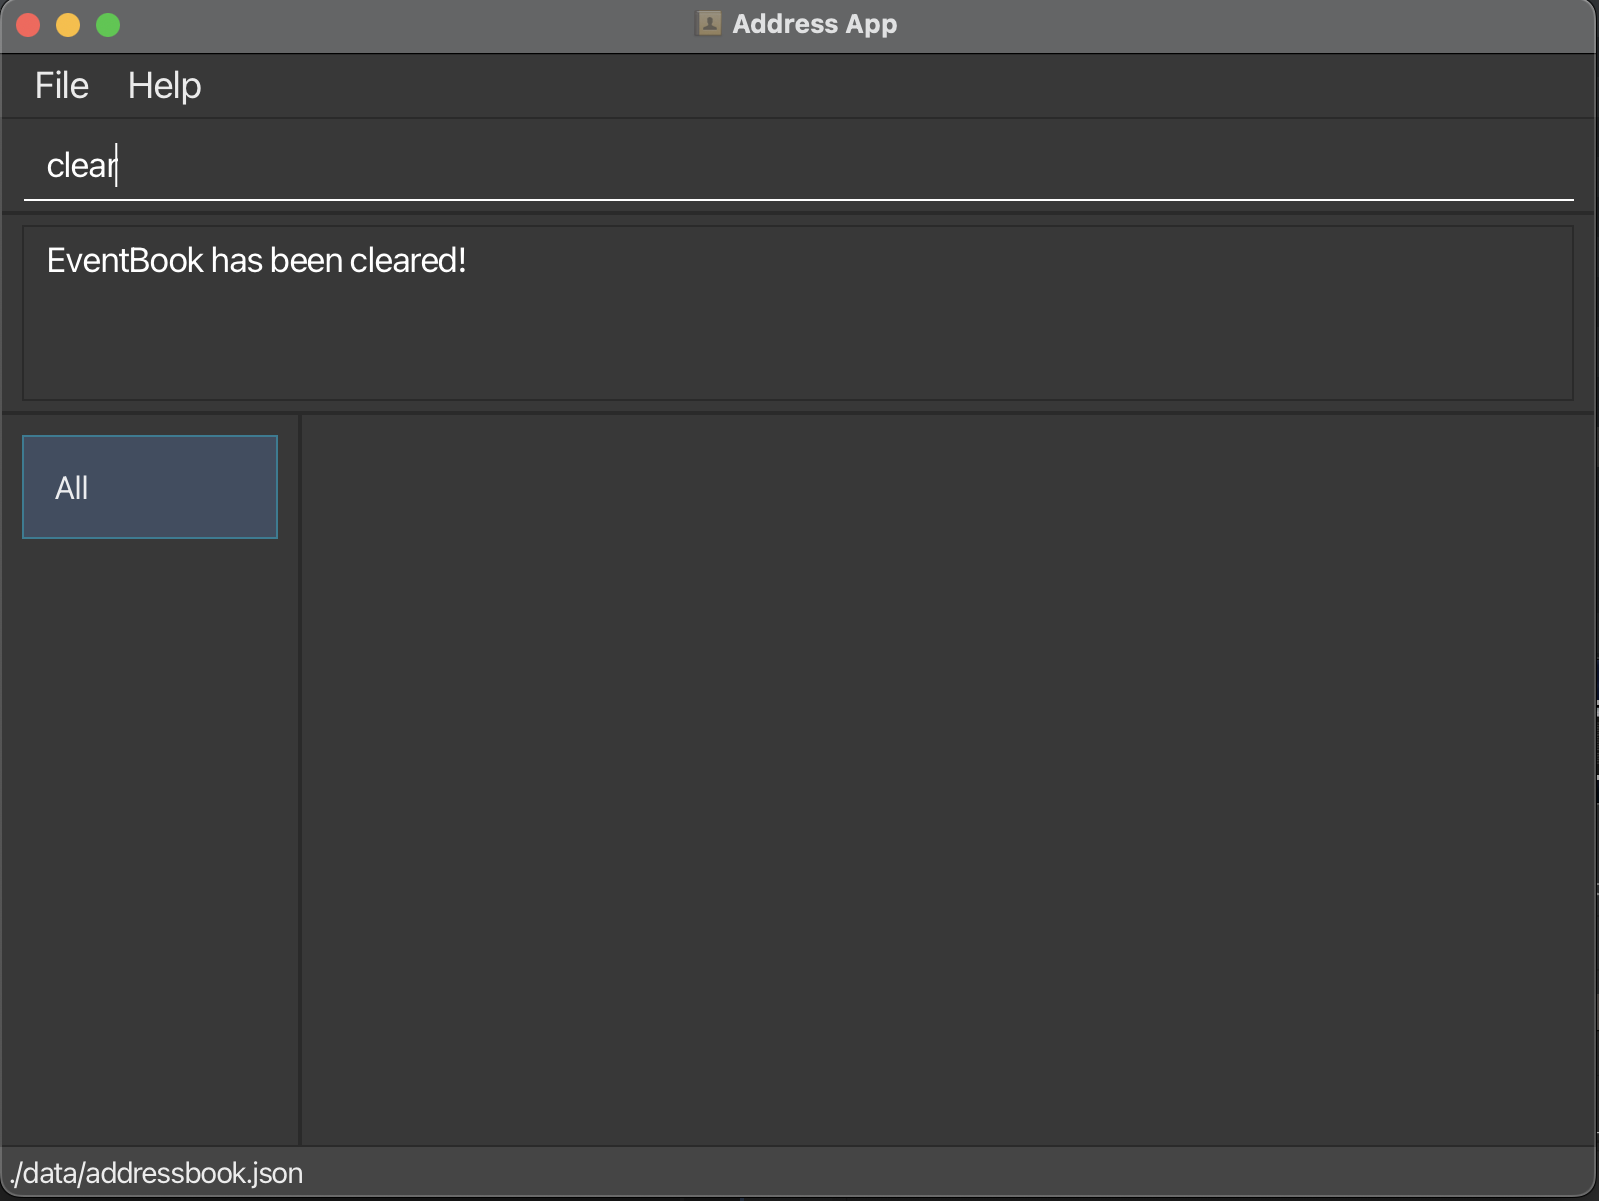
To start, if you want to remove the sample contacts in the EventBook, you can use the clear command to clear
everything!
Simply type clear in the text box at the top of the app! (Do take note that throughout this tutorial, we will not
clear the
sample contacts for the convenience doing demo.)
- Input
clear. - Success!
Create a tag with ctag
To tag a person as a friend or any tag you want, you need to first create the tag.
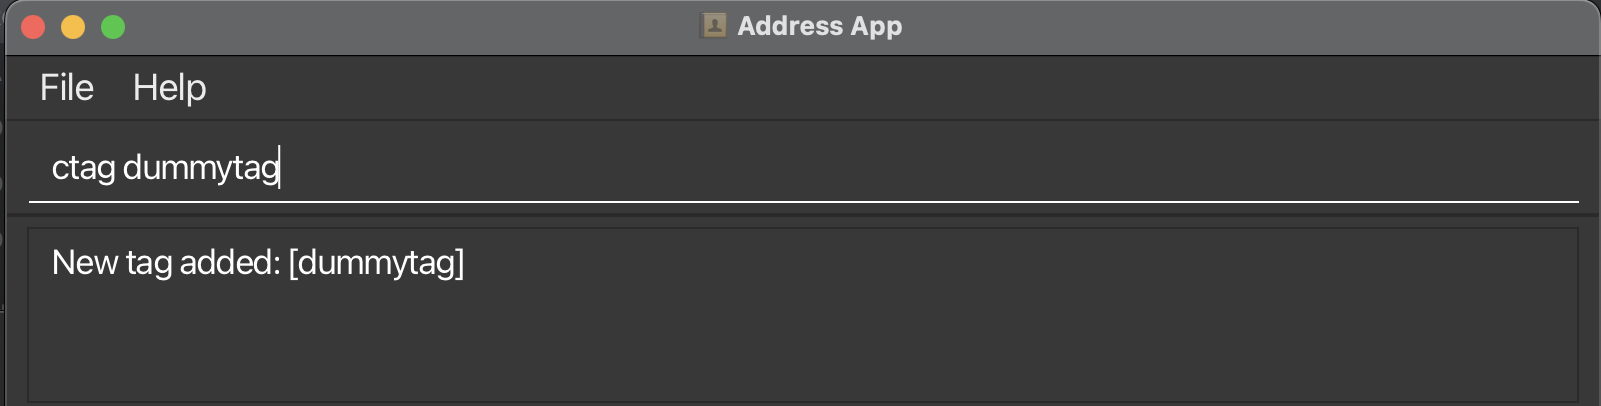
To start, create a tag called dummytag. Do take not tags are alphanumerical, so you cannot do pen-pal unfortunately.
- Input
ctag dummytag. - Success!
Using assign to tag people
To tag the person to the tag, we can use the assign command.
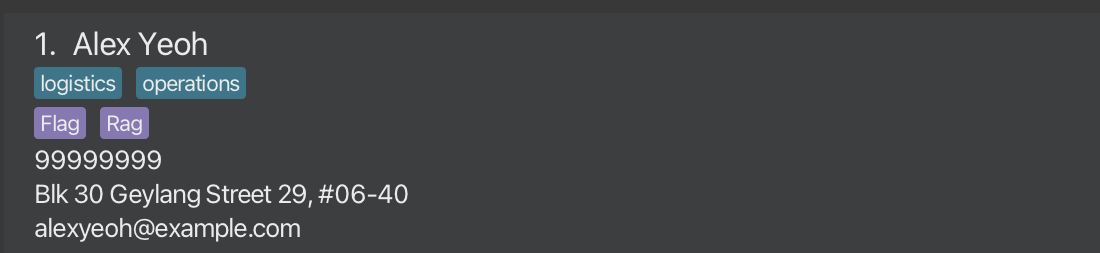
- Assign the person of interest with your tag! For this example,
we assign Alex Yeoh as part of the
logisticsby typingassign Alex Yeoh t/logistics. - Success!
Using switch to change to the event that you want
Ok, I want to check who is in an event or the event details, how can I do it?
No worries pal, we got you covered. To figure out who is in any event, use the switch command.
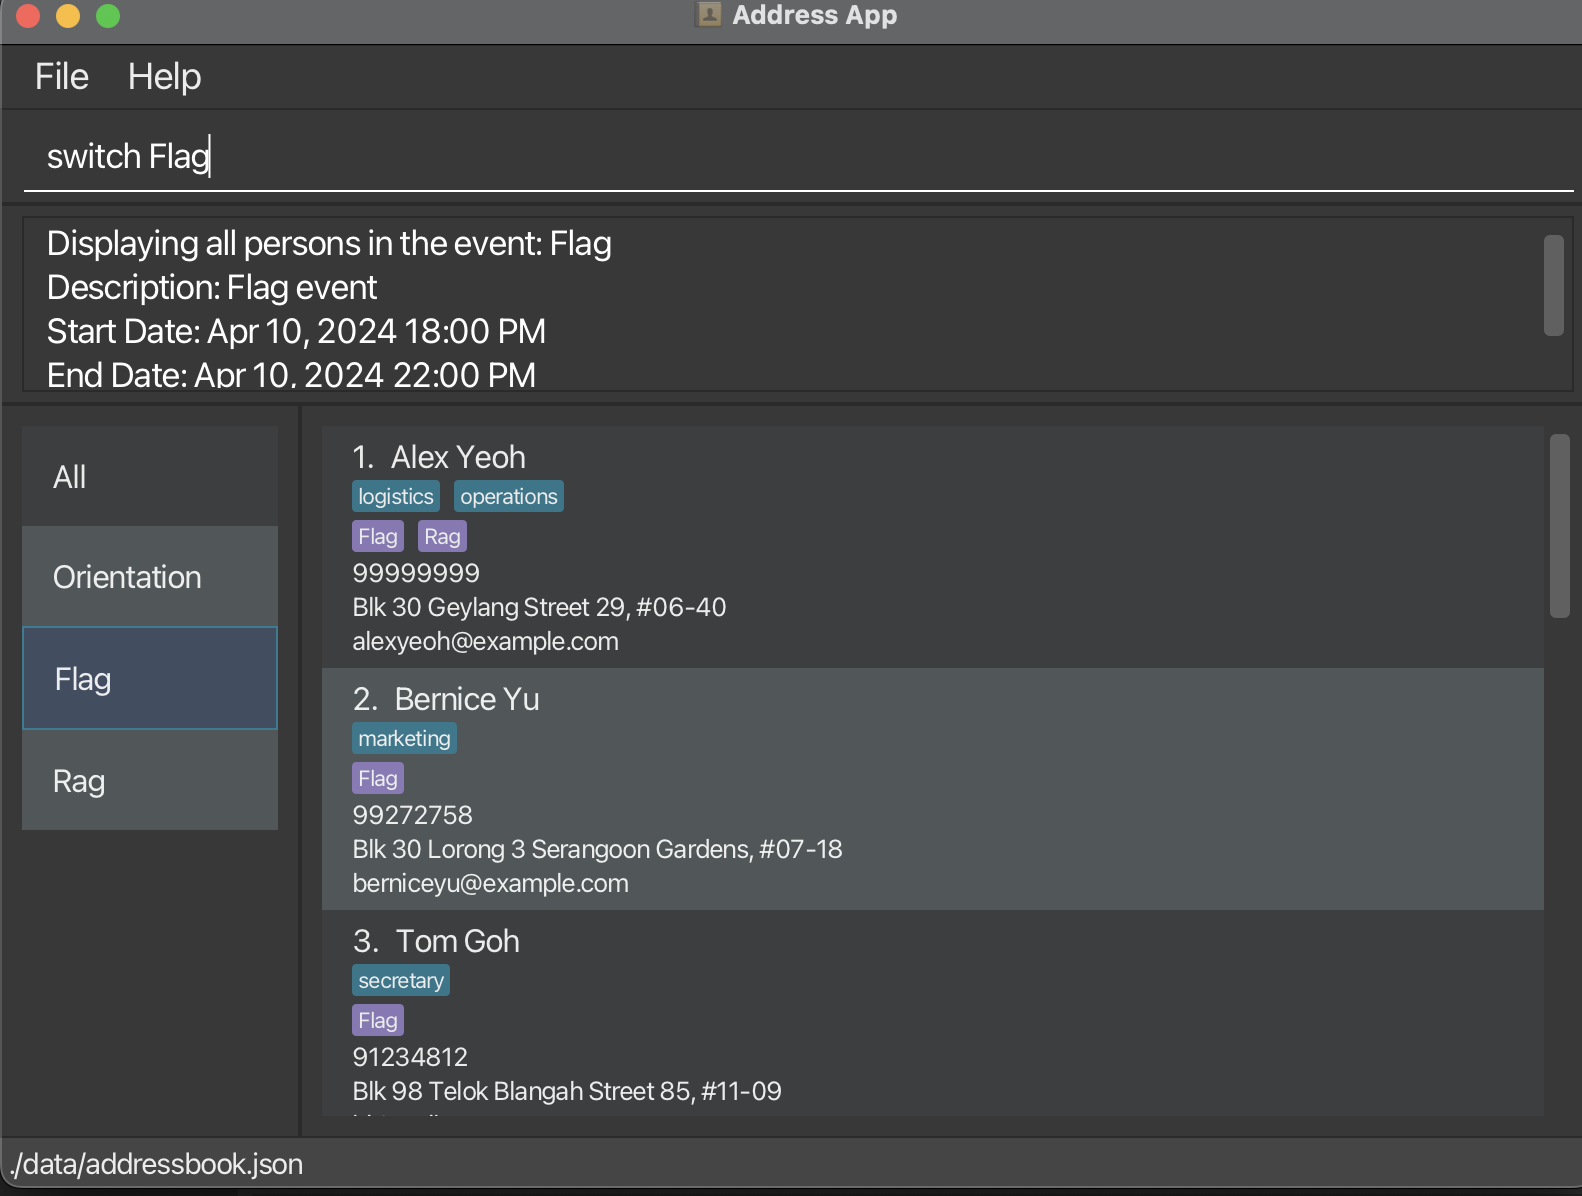
- Switch to the event named
Flagwithswitch Flag. - Success!
Using search to find the people with the tag
You may want to say, what if I don't remember who are part of the logistics team? No worries, you can use the search command to find out!
- Search for the logistic team in the event
Flagwithsearch logistics. - Success!
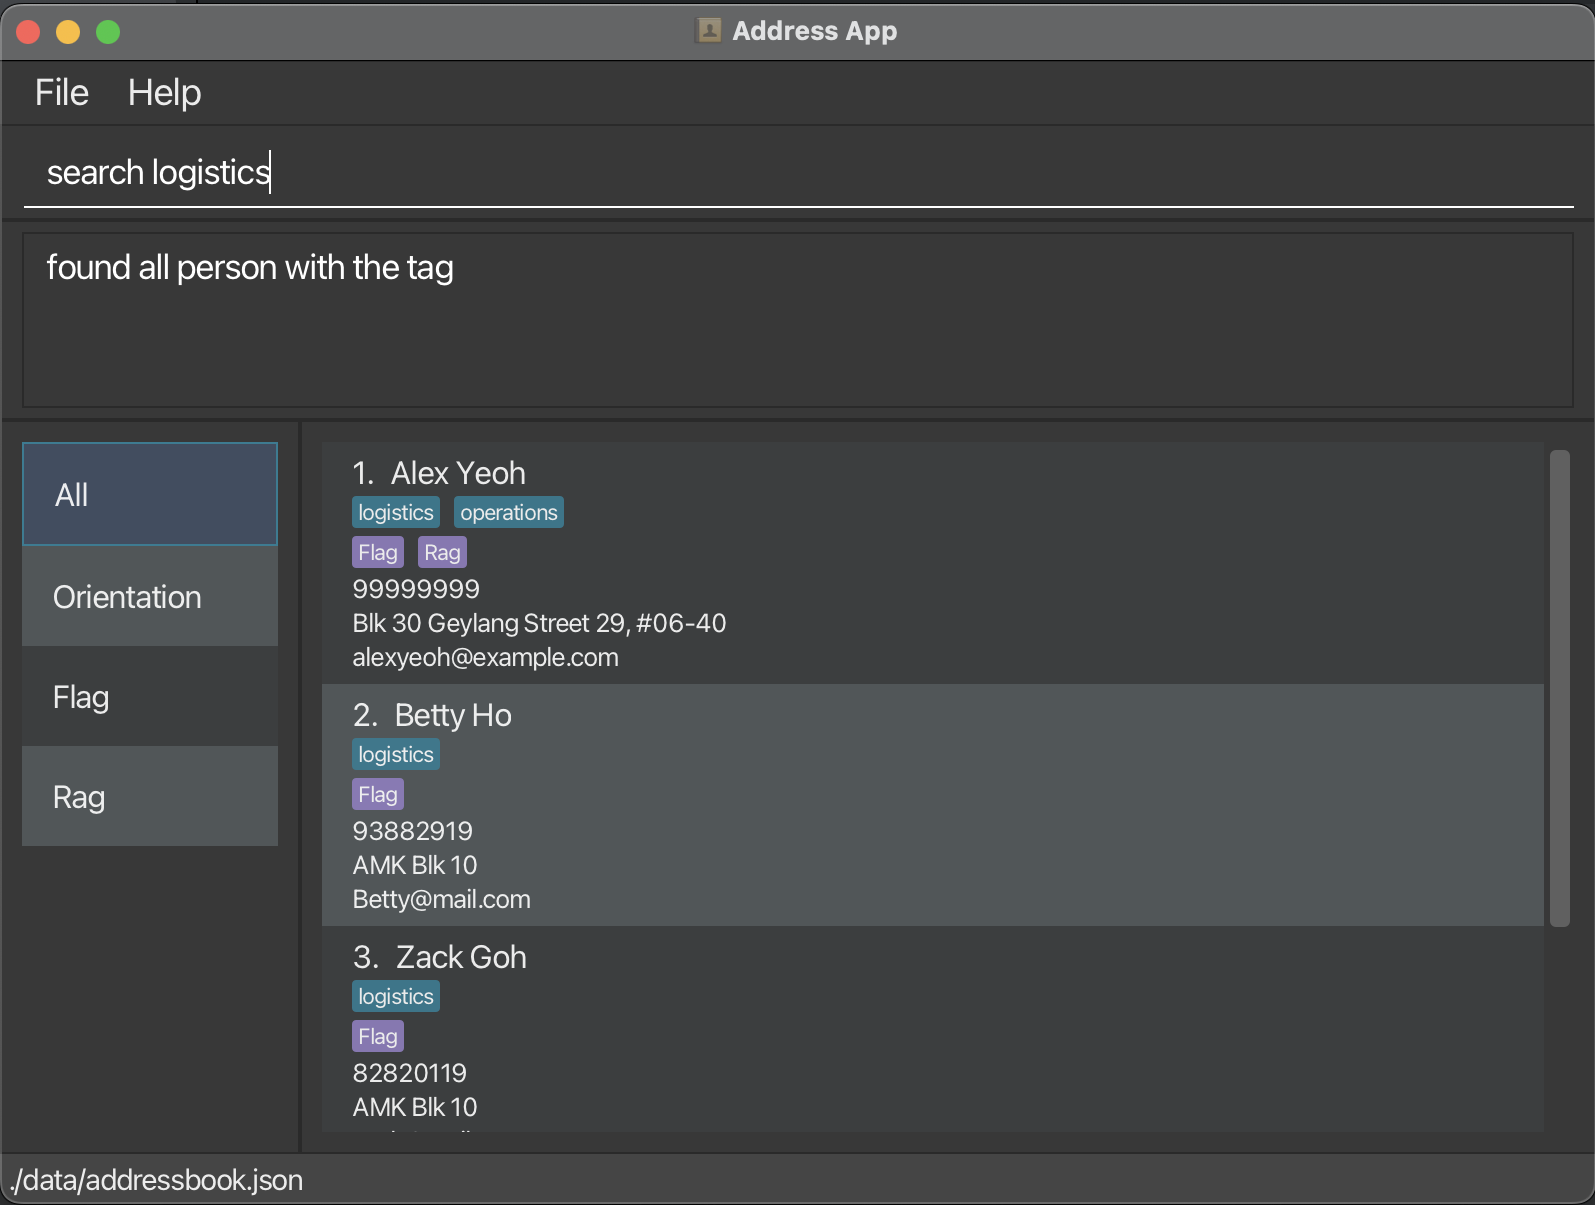
- To see all the existing contacts again, type
listin the input box to reset everything!
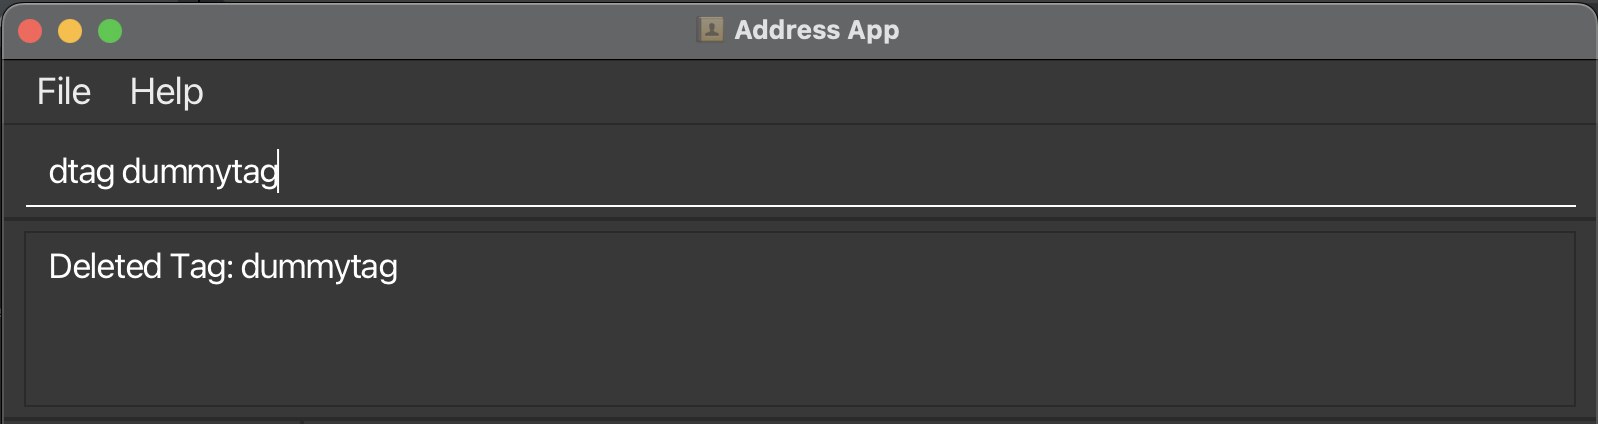
Delete a tag with dtag
Oh no, what if I want to delete a tag that I no longer use? No worries, you can use the dtag command!
This command removes the tag you delete for all your contacts so be careful!
- Delete the existing
dummytagtag using the dtag commanddtag dummytag. - Success!
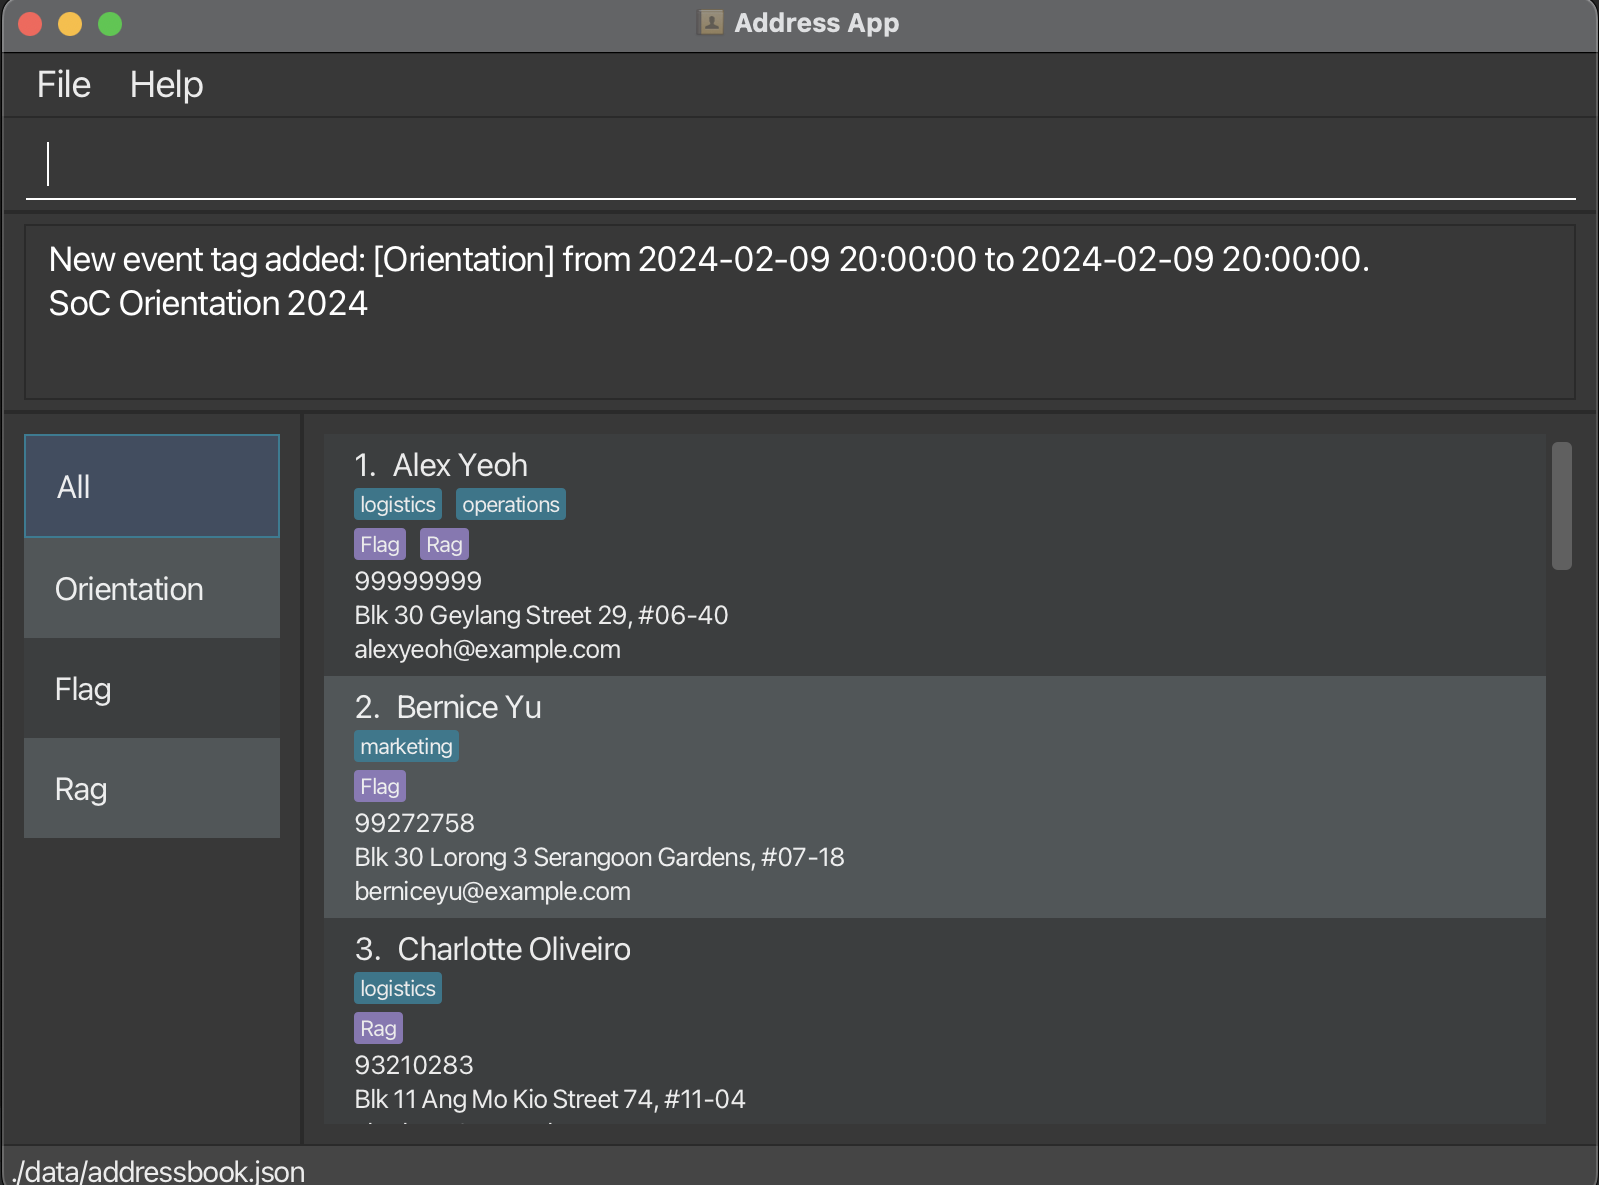
Create an event with ctag
Ok, what if you have an event that you need to group people to, like a Orientation for 9 Feb 2024 8pm? No worries, you can assign people to events
and manage them as well. But first, you should create an event first with ctag.
- Create an event called Orientation for 9 Feb 8pm with
the command
ctag t/E-Orientation dc/SoC Orientation 2024 sd/2024-02-09 20:00:00 ed/2024-02-09 20:00:00. - Success!
Assign a person to the event with assign
Now you want to assign a person to the Rag. You can do it with the
assign command.
- Assign Alex to the event
Ragusingassign Alex Yeoh t/Rag. - Success!

Command summary
| Action | Format, Examples |
|---|---|
| Add | add n/NAME p/PHONE_NUMBER e/EMAIL a/ADDRESS [t/TAG]… e.g., add n/James Ho p/22224444 e/jamesho@example.com a/123, Clementi Rd, 1234665 t/friend t/colleague |
| Assign | assign (NAME or INDEX) [t/TAG]… or assign (NAME or INDEX) [t/E-TAG]… e.g., assign 2 t/tag1 or assign John Doe t/E-event1 |
| Clear | clear |
| Delete | delete (NAME or INDEX) e.g., delete 3 or delete John Doe |
| Edit | edit (NAME or INDEX) [n/NAME] [p/PHONE_NUMBER] [e/EMAIL] [a/ADDRESS] [t/TAG]… e.g., edit 2 n/James Lee e/jameslee@example.com oredit John Doe n/James Lee e/jameslee@example.com |
| Find | find KEYWORD [MORE_KEYWORDS]e.g., find James Jake |
| List | list |
| Help | help |
| Create Tag | ctag TAG_NAME e.g., ctag Friend |
| Create EventTag | ctag t/E-eventName dc/Description sd/yyyy-MM-dd HH:mm:ss ed/yyyy-MM-dd HH:mm:ss e.g., ctag t/E-orientation dc/Orientation! sd/2024-04-04 02:02:02 ed/2024-04-05 02:02:02 |
| Delete Tag | dtag TAG_NAME e.g., dtag Friend |
| Delete Event | devent EVENT_TAG_NAME e.g., devent orientation |
| Import | import f/PATH e.g., import f/./import/import.csv |
| Export | export |
| Search Tag | search TAG_NAME e.g., search Friend |
| Switch | switch EVENT_TAG_NAME e.g. switch Flag |
FAQ
Q: How do I transfer my data to another Computer?
A: Install the app in the other computer and overwrite the empty data file it creates with the file that contains the data of your previous EventBook home folder.
Known issues
- When using multiple screens, if you move the application to a secondary screen, and later switch to using only the primary screen, the GUI will open off-screen. The remedy is to delete the
preferences.jsonfile created by the application before running the application again. - When giving enormously long inputs such as long tag/event tag names, the tag will not get fully displayed by the app.
- Date Handling. It has been identified in the Java Format library when user input an invalid date, eg: 31 Feb 2024, the system incorrectly accepts and converts it to a valid date such as 29 Feb 2024. This can result in incorrect date to be saved. Hence, it is recommended for users to manually verify that the date that they have written is accurate.